To add the button "Save as..." in the toolbar
-
Hello everybody,
When I want to add the function Save as… in the toolbar using the plugin CustomizeToolbar I can’t find the button “Save as” in the list at the left among the available buttons.
That’s curious.
Has it been missed, or is it me who miss something ?
Cheers,
Jacques -
If you turn on Plugins > Customize Toolbar > Custom Buttons
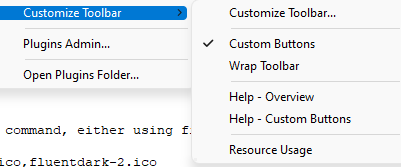
(and restart if it wasn’t already on), then you can open%AppData%\Notepad++\Plugins\Config\CustomizeToolbar.btnOpening that file will show you examples (and there is a bit more documentation in the Plugins > Customize Toolbar > Help - Custom Buttons) of how to configure it to make buttons for anything in the menus of Notepad++.
One of the example entries is for Edit > Select All:
Edit,Select All,,,*R:SA,*R:SAThis uses the “quick codes” (described in the file, and in the help) to make a red “SA” on the toolbar.
I copied that, and used the name of Edit > Save As… (the three dots are critical):
File,Save As...,,,*G:SvA,*G:SvAAfter restarting, I now have two buttons made from text:

The RedSAbutton selects all. The GreenSvbutton does the Save As… (as you can see in the screenshot, the quick codes only display two characters per button)Instead of the two quick-codes, the docs show that you could point it to a .bmp file and two .ico files (all dimensioned 32x32): the BMP is if you use the old Settings > Preferences > General > Toolbar > Standard icons: small, and the two .ico files are for Fluent (light mode) and Filled Fluent (dark mode) icons. I just couldn’t supply you with example files that you would have immediately available (so I did the quick codes for easy proof-of-functionality instead), but it would be something like:
Edit,Select All...,,,standard-1.bmp,fluentlight-1.ico,fluentdark-1.ico… where the .bmp and two .ico files go in the same directory as
CustomizeToolbar.btn. -
@PeterJones
Hello Peter,Thanks a lot for your help.
Great ! Your procedure works !
I had troubles to reproduce it. I didn’t understand why it didn’t work the first times until I thought “Gosh ! The semicolons at the beginning of the lines are probably there to transform these lines to comments !”
Then I removed the semicolon which was the first character on the newly created line, and… Ha ha ! Won ! The button appeared ! And with its tooltip. And it works.
:)
Now it will be a piece of cake to modify the icon and put a small bitmap in its place using the last step of your explanation.
Thanks a lot again, Peter !
Cheers !
Jacques (from France)
Hello! It looks like you're interested in this conversation, but you don't have an account yet.
Getting fed up of having to scroll through the same posts each visit? When you register for an account, you'll always come back to exactly where you were before, and choose to be notified of new replies (either via email, or push notification). You'll also be able to save bookmarks and upvote posts to show your appreciation to other community members.
With your input, this post could be even better 💗
Register Login